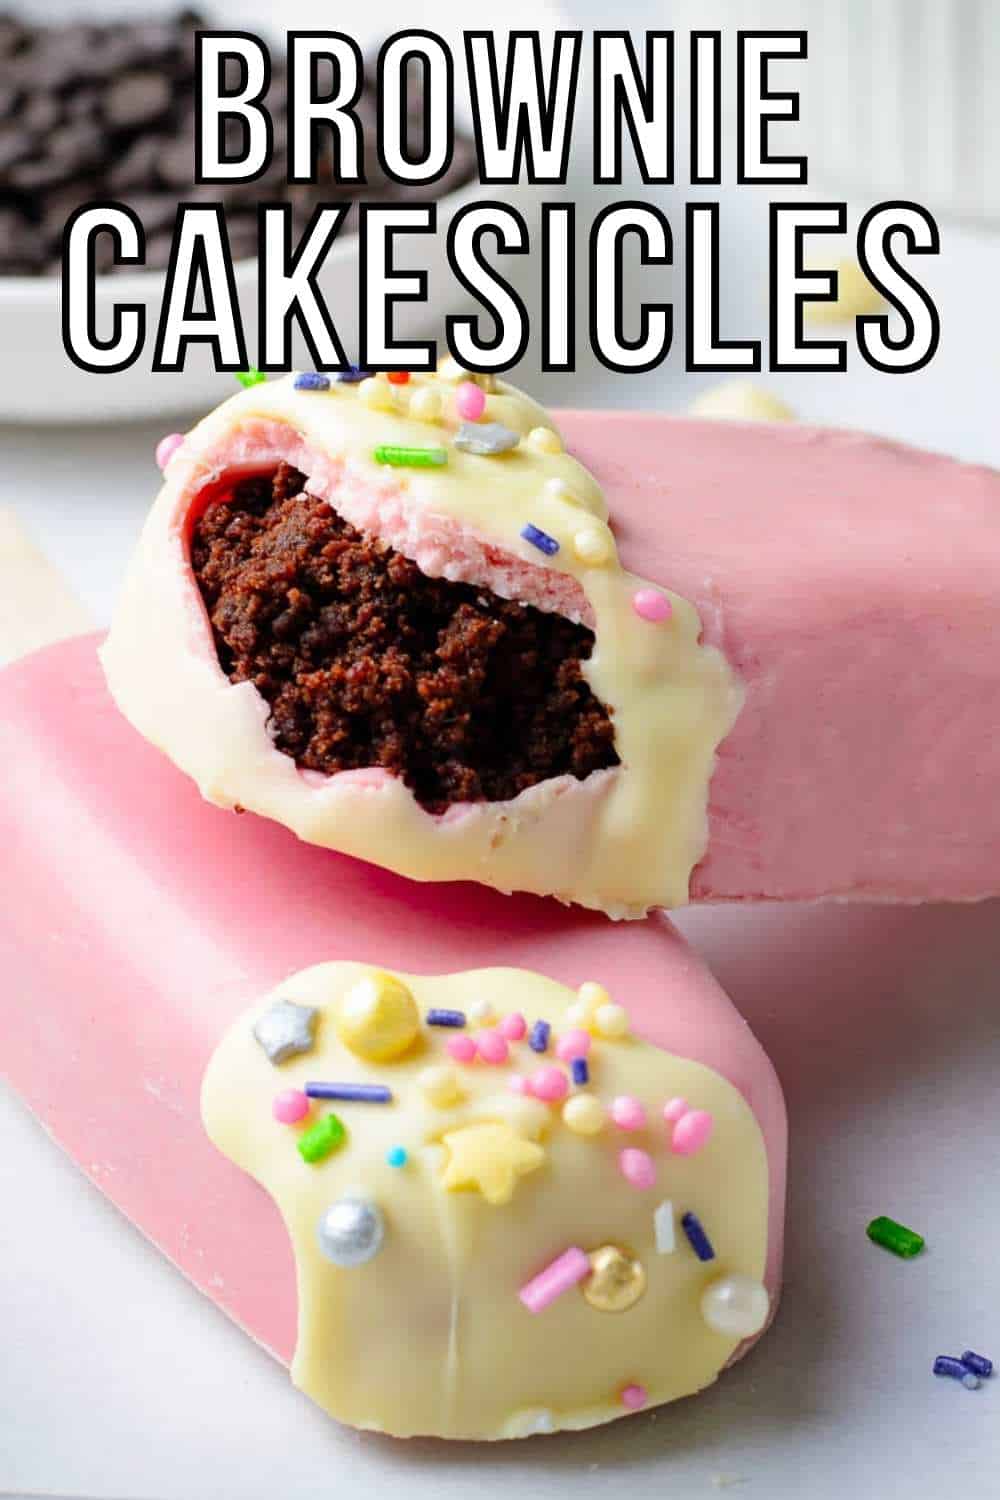
This easy and adorable Cakesicles Recipe is the perfect treat to celebrate a birthday or any special occasion! This is an easy cake pop recipe that's ultra-customizable and great to make with kids.
Jump to:
👩🏻🍳 Why You'll Love This Recipe
These super-cute cake popsicles are a fantastic option when you're looking for a festive dessert. With decadent brownie and a layer of sweet white chocolate, these tasty cakesicles are guaranteed to please people of all ages!
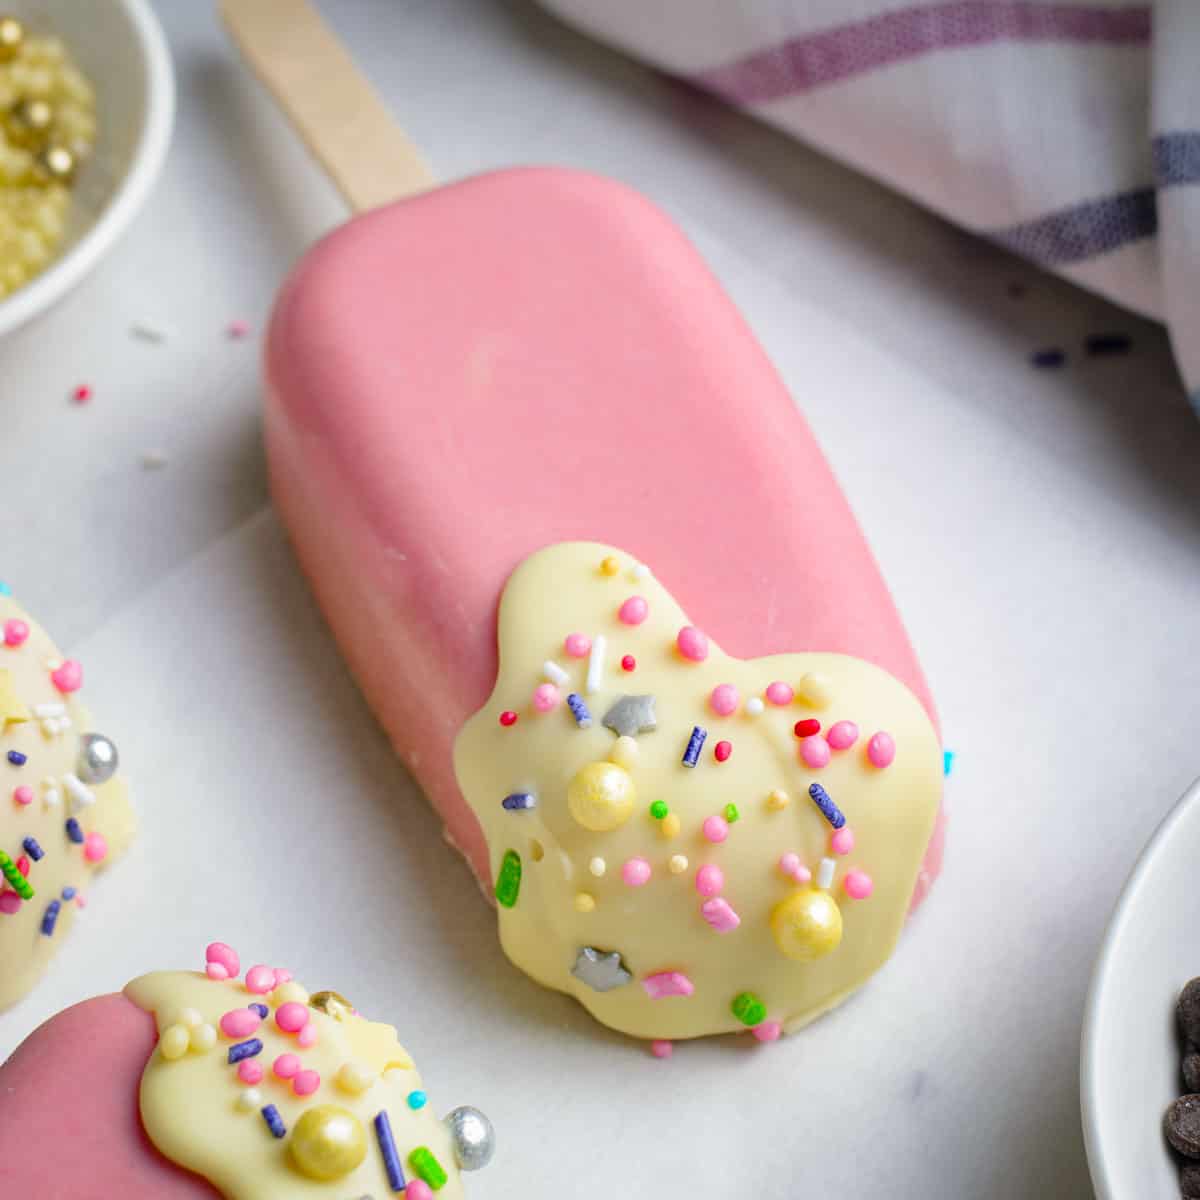
Best of all, this cakesicles recipe is completely customizable! Change up the color of the chocolate or the sprinkles to fit these cake popsicles to any occasion, whether it be a holiday, a birthday, a graduation, or whatever you need them for! This cakesicles recipe is just as fun to make as it is to eat!
For another quick and cute dessert, try these Pumpkin Cheesecake Whoopie Pies!
🥘 Ingredients Needed

- butter - softened butter works the best here.
- sugar
- eggs
- vanilla - sweetens up the brownie layer and gives it more dimension.
- semi-sweet chocolate chips - makes for a fudgy and decadent brownie interior.
- flour
- salt - standard for baking, salt helps balance out sweetness and make your brownie more complex.
- cocoa powder - provides a dark sweetness that will make your brownie interior delicious!
- chocolate frosting - you'll use this to mix into the baked brownie, which is common with cake popsicles.
- white chocolate chips - you can also use something like candy melts.
- gel food coloring - used to dye the white chocolate chips; the color is up to you!
- decorations - popsicle sticks are a must, and cute sprinkles really liven up these cakesicles!
🔪 Instructions

- Beat butter and sugar until nice and fluffy, then add the eggs and vanilla and mix for about 2-3 minutes.
- Microwave the chocolate chips on high for about 30 seconds, then remove and stir. Repeat in 15-second increments until everything is well melted.
- Add the melted chocolate chips into the butter mixture, along with the flour, salt, and cocoa powder. Mix until everything is combined.
- Pour into a pan and bake at 350 degrees F for 35-40 minutes. Allow to cool completely.
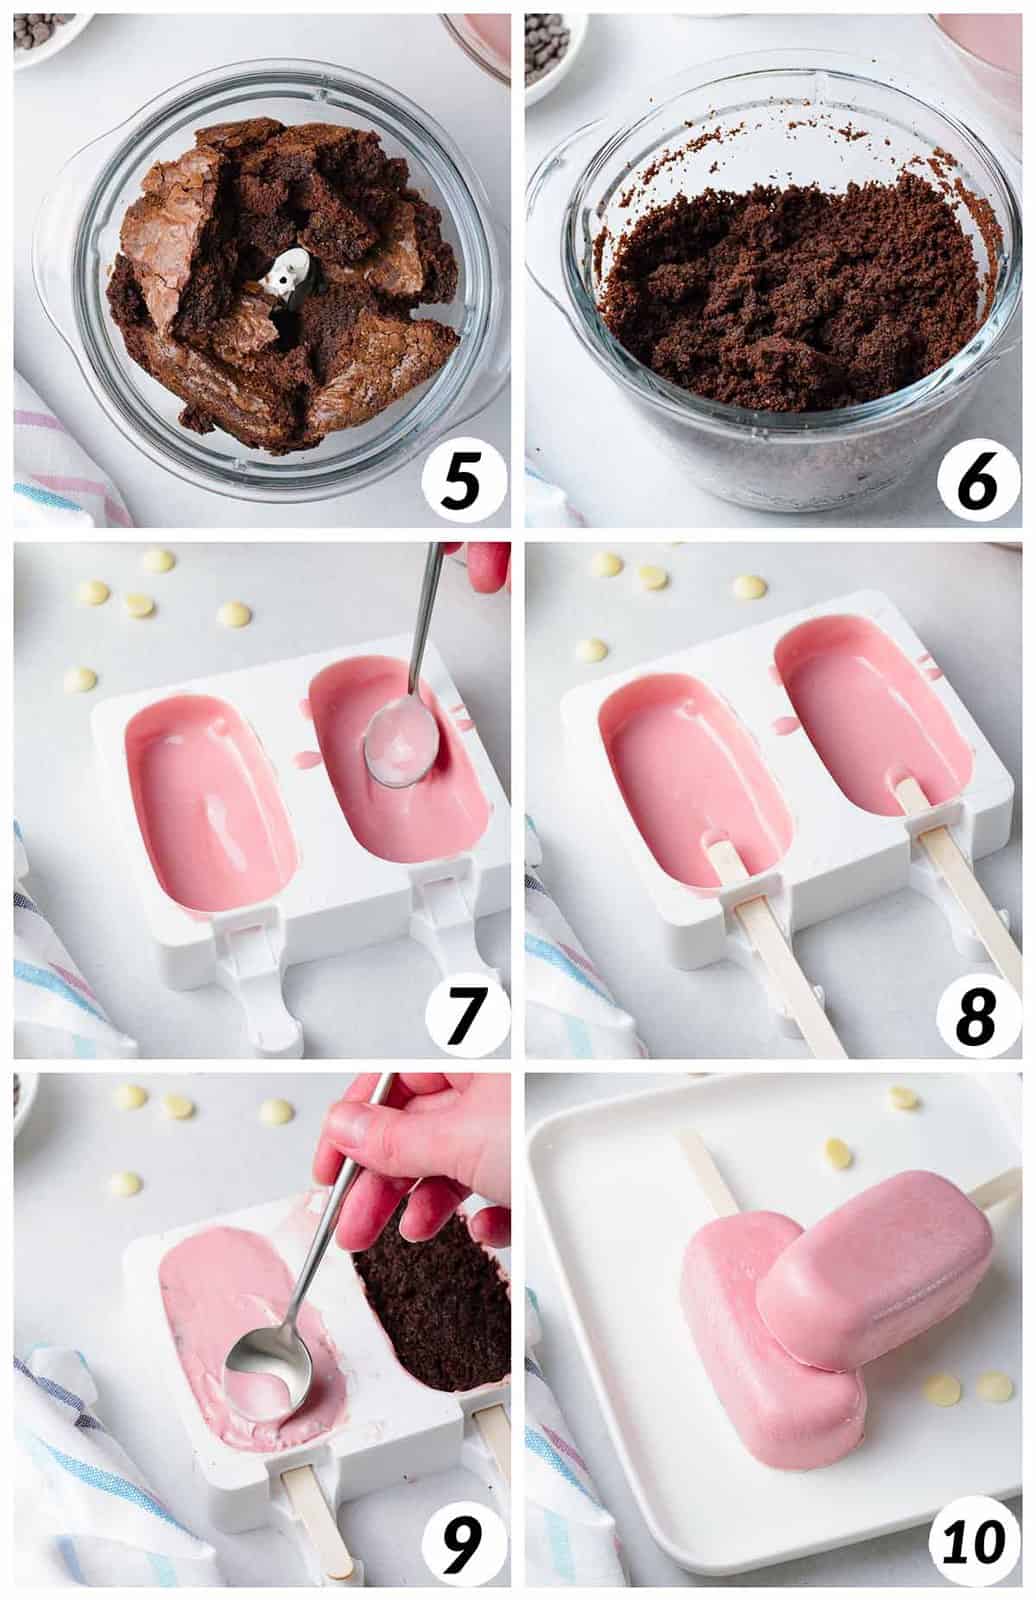
5. Break the cooled brownie into chunks and place in a food processor. Pulse until you have a breadcrumb consistency.
6. Mix the chocolate frosting into the brownie crumbs. You're looking to get a mixture that holds together but isn't super sticky or gooey.
7. Melt the white chocolate chips until smooth, then add gel food coloring and stir until distributed. Add about a tablespoon to your cakesicle mold and distribute evenly along the bottom and sides.
8. Allow to harden in the fridge for a few minutes, then add more chocolate and fill in any areas that seem thin, then refrigerate again.
9. Spoon about 2 tablespoons of the brownie mixture into the molds and gently insert one of the cakesicles sticks. Add another tablespoon of melted chocolate on top, spread to the edges, then refrigerate until hardened.
10. Carefully remove the cakesicles from their molds and enjoy!
👪 FAQs
Despite having cake in the name, cakesicles can be filled with something like brownies as well! You can also experiment with adding things like chocolate chips or sprinkles inside the cakesicles as well.
The most likely case is that you haven't used enough white chocolate. Make sure to do two layers and allow each to harden properly, and look out for any spots that seem thin or not filled in properly.
If you're using candy melts for your outer coating and want to maintain a nice glossy look, be sure to use an oil-based food coloring or flavoring.
You can, but if you leave them in for much longer there's a possibility your cake pops will dry out. Luckily for this cakesicles recipe there's no dipping required, which means no worries about your cake layer falling apart!
💭 Other Helpful Tips
- Removing the cakesicles from the mold can be intimidating, but as long as you take it slow and work them from the corners, it should work out fine!
- These cakesicles can be stored at room temperature for about a week, as long as they're wrapped up in plastic or in an airtight container. If you freeze them you risk the chocolate shell cracking, so I don't recommend that.
- If your cakesicle stick doesn't want to stay in the mold, try dipping it in the melted chocolate first and then inserting.
- When you unmold the cakesicles you may notice patches where the chocolate shell seems thin. Use a spoon and dab some extra melted chocolate into those spaces and smooth it out.
This cakesicles recipe is the perfect treat to wow your friends and family! With no dipping required, this recipe eliminates some of the frustration of classic cake pop recipes while giving you an adorable and unique dessert!
📖 Variations
- Use different flavored oils to give your chocolate shell a different taste. Something fruity like orange or raspberry would pair well with the brownie, or mint extract would make for a delicious mint-chocolate cakesicle!
- You can change the color of the chocolate shell for any occasion; pink for Valentine's Day, orange for Halloween, green and red for Christmas, or pastel colors for Easter. There are so many possibilities!
- Dip these cakesicles in another color of chocolate to give them more dimension.
- This cakesicles recipe also works with any kind of cake you like; chocolate, yellow cake, red velvet, or anything else you can think of!
🥗 Suggested Main Dishes
While delicious, this cakesicles recipe is obviously not suited for filling you up! Here are some nutritious main courses that you should enjoy before (or after; sometimes dessert just has to come first!) you enjoy these delicious brownie cakesicles.
This Slow Cooker Cranberry Chicken is a tasty and convenient meal with lots of flavor, but if you're looking for something even faster you may also enjoy Air Fryer Chicken Wings.
And if you like seafood, don't miss out on this Shrimp Curry with Broccoli and Rice!
Or for something a little different try this Broiled Sweet Chili Salmon with Lime. SO delicious!
For a delicious one pot meal with easy cleanup, check out this recipe for One Pot Unstuffed Peppers With Rice.
🧁 More Dessert Recipes
- Easy Peanut Butter S'mores Cookies - Want s'mores but don't have a campfire handy? Try these cookies instead!
- Cookies and Cream No Churn Ice Cream - Making ice cream at home can be a hassle, but not with this no churn ice cream recipe!
- Homemade Chocolate Sauce - This chocolate sauce is the perfect pairing for just about any dessert.
- Funfetti Cupcakes - These delicious treats make any occasion fun and extra special. Can’t decide between cookies or cupcakes? You don’t need to with this dessert that has 3 layers of deliciousness in every bite.

Cakesicles Recipe
Love this recipe? Awesome! Please give it a 5 star ⭐ rating below! And if you make this, snap a photo and tag me on Instagram. You can find me at DizzyBusyandHungry or #dizzybusyandhungry!
📋 Recipe Card

Brownie Cakesicles Recipe
Equipment
- Silicone cakesicle mold
- Cakesicle sticks
Ingredients
- ⅝ cup butter, softened (this is ½ cup + 2 tablespoons)
- 1 cup sugar
- 2 eggs, room temperature
- ½ tablespoon vanilla
- 7 ounces semi-sweet chocolate chips
- ⅔ cup flour
- ½ teaspoon salt
- 1 tablespoon cocoa powder
- ¼ cup chocolate frosting
- 2 cups white chocolate chips
- gel food coloring
- additional white chocolate chips, food coloring, and/or sprinkles as needed for decoration
Instructions
- Preheat the oven to 350 degrees F. Line a 9x9 inch pan with parchment paper, the spray the parchment paper with cooking spray to prevent sticking.
- In a large bowl, beat the butter and sugar until light and fluffy. Add in the eggs and vanilla and mix for about 2-3 minutes.⅝ cup butter, softened, 1 cup sugar, 2 eggs, room temperature, ½ tablespoon vanilla
- Place the semi-sweet chocolate chips in a microwave-safe bowl and microwave on high for 30 seconds. Stir, then microwave 15 seconds at a time, stirring in between, until melted.7 ounces semi-sweet chocolate chips
- Add the melted chocolate in the butter mixture. Add the flour, salt, and cocoa powder and mix until well combined.⅔ cup flour, ½ teaspoon salt, 1 tablespoon cocoa powder
- Pour the batter into the prepared pan and bake for 35-40 minutes. Cool completely.
- Break the brownie into chunks and place in a food processor. Pulse until it becomes a breadcrumb consistency.
- Add the chocolate frosting to the crumbs. If needed, use additional frosting and test consistency by pinching together a bit of the mixture. It should hold together, but not be gooey or sticky.¼ cup chocolate frosting
- Melt the white chocolate chips in the microwave until smooth. Stir in a few drops of the gel food coloring and mix. Add about 1 tablespoon of the melted chocolate to the molds and spread it around the bottom and up the sides with a spoon.2 cups white chocolate chips, gel food coloring
- Place in the refrigerator for 5-10 minutes to harden. Add another teaspoon or two and spread around the areas that seem thin and place in the refrigerator again. If the chocolate layer isn't thick enough, it can crack when you remove the cakesicle.
- Remove from the fridge and add about 2 tablespoons of the brownie filling Gently push in the popsicle stick.
- Add a tablespoon of melted chocolate on top and gently spread it over the filling. Place in the refrigerator to harden.
- Take the cakesicles out of the fridge and gently remove them from the molds.
- (optional step) For decoration, you can melt additional white chocolate, color with with gel food coloring, and add sprinkles as desired.additional white chocolate chips, food coloring, and/or sprinkles as needed for decoration
Notes
- To avoid cracking, be sure to fill in the chocolate layer and give it enough time to harden in the fridge.
- If your popsicle stick doesn't want to stay, dip it in melted chocolate and insert, then allow it to set.
- This cakesicles recipe is great to store at room temperature, but if you freeze them the chocolate shells may crack.
Video
Nutrition
Nutritional information is an estimate. The nutritional values for your final dish may vary based on measuring differences and products used.
Thanks so much for reading! I also invite you to follow me on FACEBOOK, PINTEREST, or INSTAGRAM to keep up with what's going on in my kitchen.
And you might want to check out my Dizzy Busy and Hungry store on Amazon for a whole bunch of great kitchen products I love!
Happy cooking!


Tara
Oh how fun! These cakesicles are so cute. I especially love the sprinkles. That texture looks perfect.
Kushigalu
How pretty are these cakesicles. My boys would love these. Thanks for sharing.
Tavo
What a fun recipe! I'll be making these with my nieces this coming weekend.
Thank u!
Teodora Grujic
Looks amazing! Perfect for my daughter's birthday. Thank you for sharing!
Sara Welch
These were such a fun and unique way to celebrate my son's birthday over traditional sheet cake! Easily, a new favorite treat; they were a huge hit!